 No drive-throughs or fast food here!
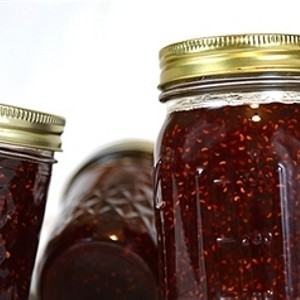
Canning is a fun, super-easy and efficient way to enjoy fresh foods all year long. Thereâs a great feeling of satisfaction from jumping on this bandwagon, and youâll quickly have an entirely new definition of “fast food.”
As quickly as you can open your pantry and pop the lid, youâll have delicious and healthy options for you and your family. Go on — give it a try!
So whatâs your motivation?
- Do you love to visit the local farmerâs market?
- Is your garden overflowing?
- Are you ready to be more financially savvy and efficient?
- How about being more environmentally responsible?
- Did you get stuck for healthy food choices when the big storm hit and you lost power?
- Or are you just ready to tap into your inner Martha, Rachael Ray, or Emeril?
There are lots of reasons to jump onto the canning and jarring bandwagon, and the payback is huge!
Best foods
Think about buying fruits and vegetables in bulk when they are in season (and cheap!) Whatâs better than fresh peaches in February or delicious tomatoes in November?
Consider these perfect and easily prepared foods for your first attempt at canning:
- Tomatoes
- Berries
- Peaches
- Beets
- Eggs
- Cucumbers
- Pumpkin
There are lots of other choices, as well. The key is to pick your favorites and to prepare them as you like. Once you understand how easy the process is, it really doesnât vary a whole lot from one type of food to another.

Make it easier to make better choices -- all year long! Walk away from the junk food!
How does it work?
So letâs get started: In this short video, Lowes does a great job of sharing a little science lesson on how the process prevents spoiling.
10 easy steps
1. Put on some great tunes, and prep your space so you can play in the kitchen for a couple of hours.
2. Prepare the food youâll be canning; pay attention to the amounts and make sure you have enough jars to fill the amount that youâve prepared.
3. Thoroughly clean the canning jars, and then cover them with boiling water until they are ready to be filled. When youâre ready to put the foods into the jars, pull them out of the water and leave them on a clean dishtowel.
4. Fill jars with your favorite foods; add a quarter- to a half-teaspoon of salt to vegetables.
5. Add boiling water to jars, and be sure to leave space between the goods and the lid. Each recipe will instruct you how much of this head space to leave.
6. Release air bubbles by scooping a non-metallic kitchen utensil (like a small rubber spatula) around the inside walls of the jar.
7. Clean and wipe the outer rim of each jar so that the lid will secure tightly, and then place band and lid securely on each jar.
8. Place jars into your canner, as directed. Remove when ready, and let cool on towel for 24 hours.
9. Test the seal: Press the center of each lid. If the indentation “holds,” then the jar is sealed. If it does not, then you can reprocess or store for up to three days in your fridge.
10. Store in 50-70 degrees Fahrenheit until youâre ready to enjoy your healthy and delicious harvest!
Supplies:
You donât need much! A canner or pressure cooker, jars, jar lifter, and a wide-neck canning funnel — and youâre ready to roll. Easy, right?
When was the last time you tried something for the first time in your life?
Itâs a great question, isnât it? Break out, and try something new this season. THIS is the way “fast food” used to be, and you know what? Nowâs the perfect time to try it yourself. Experiment, have fun with it, and reap the benefits all year long. Enjoy!
Valerie J. Wilson is a freelance writer for many companies, organizations, and individuals like David Kiger.


